Main
  • Home
  • Feed
  • Games & Tips
  • Find Local Games
  • Events & Tournaments
  • Pinball News
  • Flippd Blog
Account
  • Settings
  • Submit Feedback
  • Patreon
Flippd Logo
© 2026 Flippd. All rights reserved.

Site Links

  • About
  • Contact
  • DMCA
  • Privacy Policy
  • Terms of Service

Affiliates

  • Locations by Pinball Map
  • Game Data from OPDB
  • Images from IPDB
  • Tips / Tournaments from MatchPlay
  • Tournaments from IFPA

Join Us

Pinball news
HomeGames
EventsSign in
Games & Tips
>
Escape from the Lost World
BALLY

Escape from the Lost World

1988
★6.9(50 reviews)
Find nearby

ABOUT

This game uses the 68000-based "Sounds Deluxe" sound board. Front legs are standard 28-1/2 inch legs while the rear legs are 34 inches.

IMAGES

Image # 4193: Escape from the Lost World Flyer, Front
Image # 4194: Escape from the Lost World Flyer, Back
Image # 17138: Escape from the Lost World Backglass
Image # 17139: Escape from the Lost World Upper Playfield
Image # 17140: Escape from the Lost World Lower Playfield
Image # 17141: Escape from the Lost World Playfield View
Image # 17142: Escape from the Lost World Cabinet - Left
Image # 17143: Escape from the Lost World Cabinet - Right
Image # 31235: Escape from the Lost World Illuminated Backglass
Image # 31236: Escape from the Lost World Playfield
Image # 31237: Escape from the Lost World Upper Playfield
Image # 31238: Escape from the Lost World Lower Playfield
Image # 31239: Escape from the Lost World Cabinet - Left
Image # 31240: Escape from the Lost World Inside Backbox
Image # 35161: Escape from the Lost World Outhole Detail
Image # 35162: Escape from the Lost World Right Return Lane Detail
Image # 35163: Escape from the Lost World Treasure Targets Detail
Image # 35164: Escape from the Lost World Backglass
Image # 35165: Escape from the Lost World Lower Playfield
Image # 35166: Escape from the Lost World Center Playfield
Image # 35167: Escape from the Lost World Upper Playfield
Image # 35168: Escape from the Lost World Playfield
Image # 35169: Escape from the Lost World Mountain Range Detail
Image # 45365: Escape from the Lost World Playfield Glass Silkscreen Art 
(This glass is leaning against a wall decoration.)
Image # 49185: Escape from the Lost World Playfield 
(The playfield glass shows the artwork applied to its underside.)
Image # 49186: Escape from the Lost World Upper Playfield 
(The playfield glass had been removed in this image.)
Image # 49187: Escape from the Lost World Middle Playfield 
(The playfield glass had been removed in this image.)
Image # 49188: Escape from the Lost World Lower Playfield 
(The playfield glass had been removed in this image.)
Image # 49189: Escape from the Lost World Cabinet - Right
Image # 49190: Escape from the Lost World Under Playfield
Image # 49191: Escape from the Lost World Inside Backbox
Image # 49192: Escape from the Lost World Under Lower Playfield
Image # 49193: Escape from the Lost World Under Middle Playfield
Image # 49194: Escape from the Lost World Under Upper Playfield
Image # 49216: Escape from the Lost World Under Elevated Playfield
Image # 49217: Escape from the Lost World Upper Playfield Exposed  
(The elevated playfield has been hinged upward in this view.)
Image # 49218: Escape from the Lost World Playfield in Service Position
Image # 50368: Escape from the Lost World T-Rex Sticker Image
Image # 50369: Escape from the Lost World Ball Guide Between Playfields
Image # 50370: Escape from the Lost World Ball Trough
Image # 50371: Escape from the Lost World Left Ramp
Image # 50372: Escape from the Lost World Apron (Lower Mountain)
Image # 50373: Escape from the Lost World Top Mountain
Image # 50374: Escape from the Lost World Vulcano
Image # 50375: Escape from the Lost World Golden Bridge
Image # 50376: Escape from the Lost World Playfield Plastic Detail
Image # 50377: Escape from the Lost World Playfield Plastic Detail
Image # 50378: Escape from the Lost World Playfield Plastic Detail
Image # 50379: Escape from the Lost World Playfield Plastic Detail
Image # 50380: Escape from the Lost World Playfield Plastic Detail
Image # 50381: Escape from the Lost World Playfield Plastic Detail
Image # 50382: Escape from the Lost World Playfield Plastic Detail
Image # 50383: Escape from the Lost World Playfield Plastic Detail
Image # 50384: Escape from the Lost World Playfield Plastic Detail
Image # 50385: Escape from the Lost World Top Playfield With The Upper Field Upright Position
Image # 50386: Escape from the Lost World Total View Without Plastics
Image # 50387: Escape from the Lost World Top Playfield Down Without Plastics
Image # 50388: Escape from the Lost World Collect Treasure Gate Detail
Image # 50389: Escape from the Lost World Typical Mountain Breakage
Image # 50390: Escape from the Lost World Volcano Exit Detail
Image # 50391: Escape from the Lost World Center Playfield Detail
Image # 79899: Escape from the Lost World Cabinet - Front
Image # 79900: Escape from the Lost World Inside Coin Door
Image # 79901: Escape from the Lost World Score Display
Image # 79902: Escape from the Lost World Sound ROMs
Image # 79903: Escape from the Lost World Game ROMs
Image # 82966: Escape from the Lost World Preliminary Sketch 
(Artist is Greg Freres.Color markers on drawing paper or blueprint paper.Dimensions approximately 22 inches by 6 inches.)

Images via IPDB.org

Pinside ID158
Manufactured ByBally Manufacturing Co.
DateJanuary 1988
TypeSS
IPDB ID789
Players4

HIGH SCORES

REVIEWS

View all

No reviews have been added for this machine yet.

PINTIPS

View all
multiball
3
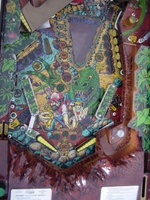
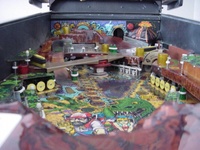
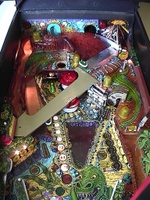
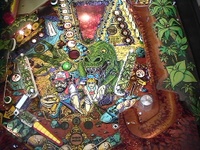
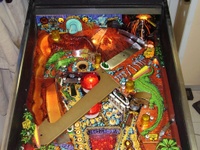
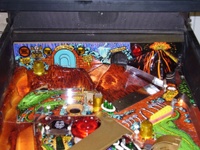
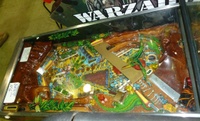
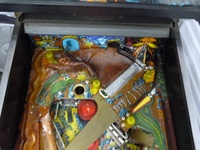
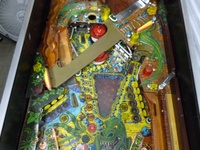
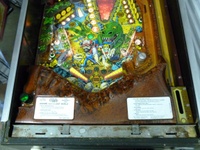
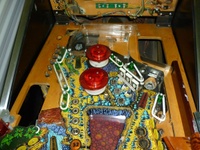
Advance to multiball (three green inserts just above flippers) by short plunging or shooting to lower right vuk. Three hits and multiball
general
2
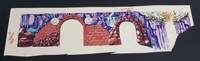
Collect treasure for big points, build the value, shoot from upper left flipper over the bridge, collect by shooting to Collect Treasure
general
1
Open the gate to collect treasure by completing the drops. Can be backhanded safely on some machines.

Featured Videos

IN-DEPTH GAME GUIDES

Create guide

No guides have been added for this machine yet.

general
1
From the main level, shooting the VUK at center right can be a much safer shot than trying to shoot the left ramp.